Leave Your Message

2026 Top Table Top Ice Maker Buying Guide for Buyers

A Table Top Ice Maker can turn a warm afternoon, crowded kitchen, or small office into a more convenient place to serve cold drinks. But compact size does not guarantee the right fit. Buyers should compare ice output, cycle time, storage capacity, dimensions, noise, and power use. A machine that makes ice quickly may still have a small basket that needs frequent emptying. Small details matter.

This 2026 buying guide explains how to judge those trade-offs before choosing a model. Check whether the stated production rate reflects a full day of operation or ideal test conditions; real results can change with room temperature, ventilation, and water temperature. Look for clear cleaning instructions, accessible controls, and a drain that suits your counter or sink setup. Also confirm the machine’s measurements, since handles and open lids can need extra space. Not glamorous, but useful.

Price alone tells little. A cheaper unit may serve occasional drinks well, while a busier household may value a larger basket and simpler maintenance. Neither choice is automatically better. Product specifications can vary by model and market, so verify current details with the manufacturer or seller before buying. This guide offers practical comparison points, not a promise that one machine fits everyone. Consider how much ice you actually use on an ordinary day. That estimate is easy to overlook.
2026 Top Table Top Ice Maker Buying Guide for Buyers

How Tabletop Ice Makers Work

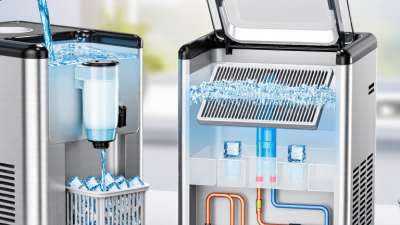
A tabletop ice maker usually builds ice around chilled metal fingers rather than freezing a full tray. Inside, a compressor circulates refrigerant through a sealed cooling system, carrying heat away from the evaporator. A small pump draws water from the reservoir and moves it over those cold fingers. Ice grows in layers. It is a simple cycle, but not an instant one. When sensors detect enough ice, many models briefly warm or release the fingers, dropping the pieces into the storage basket. The fan pushes warm air out through the vents, so leave clear space around the sides and back.

The basket is usually insulated, not actively refrigerated. Ice may soften and drain back into the reservoir, where the next cycle can reuse the water. That is normal. Expect the first few batches to be smaller or uneven while the machine and water settle; room temperature, water temperature, and ventilation affect output. Keep the reservoir within its marked fill line, and use clean drinking water to reduce residue on the pump and cooling surfaces.

If production slows, check airflow and empty a crowded basket before assuming a component has failed. One limitation is easy to miss: a countertop unit makes ice continuously, but does not keep a large reserve frozen. Planning around that takes a little practice.
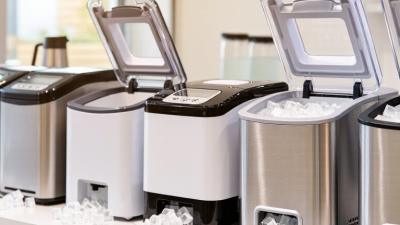
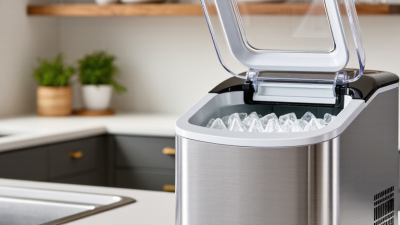
Common Ice Types and Their Everyday Uses

Common ice types matter because shape affects cooling, chewing, and how quickly a drink becomes diluted. Many compact countertop machines make hollow bullet ice. It chills water, soda, and juice quickly, and its curved shape is easy to scoop. However, it can melt faster than dense cubes in a warm drink. Nugget ice is softer and easier to chew, making it popular for iced tea and casual sipping. Larger, solid cubes usually melt more slowly, which suits drinks meant to stay cold over time. Some countertop models offer different shapes, but output and texture vary by machine. There is no perfect shape. Match the ice to your usual drinks, not just its appearance.

Tips: Check the machine’s stated ice size and daily output. Make a small batch before guests arrive. Keep finished ice in a freezer-safe container; the machine’s storage bin may not keep it frozen.

Consider your routine before buying. For quick lunches, bullet ice may be practical. For frequent cold drinks, nugget ice can feel more pleasant to chew. If you prefer slower melting, use larger cubes where available. Read cleaning instructions carefully, since regular care helps maintain ice quality. I once underestimated how quickly a small bin fills during a gathering. It is an easy detail to overlook.

How to Match Capacity and Size to Your Needs

Choosing a tabletop ice maker starts with how much ice you use, not the largest number on the box. A machine advertised for 25 pounds per day does not store that amount at once. Its basket may hold only a few pounds, so frequent parties can outpace production. For one or two people making occasional cold drinks, a smaller unit may be enough. Busy households may prefer faster cycles and a larger basket. Check whether the stated daily output assumes cool room conditions; warm kitchens can slow production. Small detail, big difference.

Measure the counter before buying. Include space for the lid to open, the power cord, and airflow around the sides and back. A compact footprint can still feel bulky beside a coffee maker. Check the water reservoir size, too: a small tank means more refills, while a larger one takes up room. Think about where melted ice goes and whether the machine needs draining after use. If you plan to move it between rooms, weight matters. It is easy to overlook that until the first lift. Choose a capacity that fits your normal routine, with a little room for guests, rather than paying for output your kitchen cannot use.

Features to Compare Before Choosing a Model

When comparing countertop ice makers, start with output, batch time, and storage capacity. Grand View Research estimated the global ice maker market at USD 5.69 billion in 2023, with a projected 5.7% annual growth rate from 2024 to 2030. That market estimate signals broad demand, but it cannot tell you which machine fits your kitchen. Check whether listed output is measured over a full day or a short test cycle.

Match capacity to real use. A small household may value a compact footprint and quick first batch more than a high daily-output figure. For gatherings, compare the ice basket size and how often it must be emptied. It is easy to overfocus on speed. The refill routine matters.

Check noise, energy use, and cleaning requirements before choosing. Look for published wattage, reservoir capacity, and clear cleaning instructions; vague claims are hard to compare. Ice shape also affects use: small cubes chill drinks quickly, while larger pieces melt more slowly. Small detail. Check operating-temperature limits, too, since a warm countertop or enclosed space may affect performance. If specifications omit test conditions, treat capacity claims cautiously and compare models using the same measures.

2026 Top Tabletop Ice Maker Buying Guide

Compare advertised daily ice-production ratings when choosing a model.

How to use this chart: These are representative advertised capacity ratings, not a market average. Actual output can vary with room temperature, water temperature, and usage. Also compare bin capacity, cycle time, footprint, and cleaning requirements; a higher daily rating does not mean the storage bin holds more ice.

Setup, Cleaning, and Routine Maintenance

Place the tabletop ice maker on a level, dry counter with the ventilation clearance specified in its manual. Wash removable parts before use, then run the cleaning cycle and discard the first batch if the instructions recommend it. Use potable water; avoid filling above the marked line. Small setup details matter.

For routine care, switch off and unplug the unit before wiping it. Clean the bin, scoop, and water-contact parts with a soft cloth and approved cleaner; never immerse the electrical housing. Follow the manufacturer’s schedule for descaling, especially where hard water leaves white deposits. The FDA Food Code 2022 directs operators to clean ice bins at the frequency specified by the equipment manufacturer. A missed corner is easy to overlook. CDC estimates that norovirus causes 19–21 million illnesses in the United States each year; this figure is not specific to ice makers, but it underscores why careful food-contact hygiene matters. References: FDA Food Code 2022, Section 4-602.11; CDC, Norovirus: About.

2026 Top Table Top Ice Maker Buying Guide for Buyers - Setup, Cleaning, and Routine Maintenance
Buying or Care Topic What to Check or Do Practical Guidance
Daily ice demand Compare the maker’s stated daily production with your typical use. Published output is generally a test-condition figure, not a guarantee of continuous daily supply. Allow for room temperature, water temperature, and recovery time between batches.
Ice basket capacity Check how much finished ice the removable basket can hold. Basket capacity is different from daily production. Many countertop models do not keep stored ice frozen, so use the ice promptly or transfer it to a freezer.
Counter space and ventilation Measure the appliance footprint and review the required clearance in its manual. Place the unit on a stable, level, water-resistant surface. Keep air inlets and outlets unobstructed, and avoid placing it beside a heat source or in direct sunlight.
Water and power Confirm the water-fill method, reservoir capacity, and electrical requirements. Use potable water and a grounded outlet that meets the product’s rating. Do not use an extension cord unless the manufacturer explicitly permits it.
First setup Unpack, position, and prepare the appliance according to its instructions. Remove packaging and check for shipping damage. If the unit was transported on its side, follow the manual’s waiting period before plugging it in. Wash removable food-contact parts before first use.
First ice cycles Fill the reservoir to the marked level and run initial cycles as directed. Discard the first batch or batches if the manual recommends it. This helps clear residual water from the initial setup; do not exceed the reservoir’s maximum fill line.
Routine cleaning Clean the reservoir, basket, scoop, and accessible interior surfaces regularly. Switch off and unplug the unit first. Use a soft cloth and mild detergent where permitted, then rinse food-contact surfaces with clean water and dry them. Never immerse the appliance or power cord.
Mineral scale Adjust cleaning frequency to local water hardness and the manual’s schedule. Hard water can leave mineral deposits. Use only a descaling product or method approved for the appliance, and rinse thoroughly afterward; avoid unapproved chemicals or abrasive tools.
After each use Empty leftover water and let the interior dry when the appliance will be stored. Follow the drain instructions for the specific model. Leave the lid open only as directed, and keep the unit clean and dry between uses to reduce stale odors and standing water.
Regular inspection Check the cord, plug, vents, drain cap, and reservoir for visible damage or buildup. Unplug the unit before inspection or cleaning. Stop using it if the cord is damaged, water leaks near electrical parts, or the appliance shows unusual operation; consult the manufacturer’s service guidance.